Farmer’s Market Meals

042813171220

Saturday was the last indoor Farmer’s Market at Old Trail School.  While I’m happy that the Farmer’s Market continues outdoors at the Howe Meadow in May, I will miss the challenge of the winter farmer’s market.

What challenge, you ask?  Well, the winter farmer’s market is smaller, which means less vendors, and of course, in the winter in Ohio, there is less produce to be sold.  I’ve learned that to get the best haul, it is necessary to get there early and wait for the market to open.  Here’s my favorite part – they open the market by ringing a cowbell!  As soon as the cowbell rings, all the people eagerly lined up at the door surge forward with one goal – get the carrots!  Or greens.  Or radishes.  Or whatever it is that looks the freshest, the most crispy – and get it before it’s sold out!

I’ve got this down now – as soon as the bell rings, you bypass the vendors on the first floor (coffee, tea, prepared foods), go past whichever musician is providing music this week, and head immediately down to the gymnasium of the school.  This is where the good stuff is!  Ignore the cheese, the bread, the pasta – it’s not going anywhere.  Instead, push (politely) through the crowd to the back of the gym and the produce vendors.

This week, I grabbed Siberian Kale, mixed salad greens, two bundles of tiny beautiful carrots, and a bunch of ramps from one vendor, plump red radishes from another, and lovely bok choy from a third.  Veggies done!

Isn't the bok choy lovely?

Isn’t the bok choy lovely?

Ramps!  I've never cooked with these before, so it should be an adventure!

Ramps! I’ve never cooked with these before, so it should be an adventure!

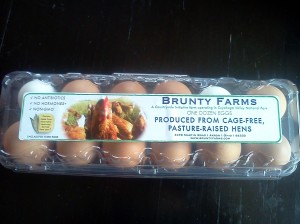
Next – eggs.  There is no comparing a supermarket egg to a fresh, local egg.  It’s just no contest!  Fresh and local wins hands down every time.  The eggs have better color and unbelievable flavor.

Nothin' beats a farm fresh egg.

Nothin’ beats a farm fresh egg.

This time, I also picked up some brats from Brunty Farms.  They had both beer brats and apple brats, so of course I wanted to try both!  (They were awesome, by the way.)

I’ve been thinking a lot about what I eat and why.  If I look honestly at what I’m eating now compared to what I ate a year ago, I can say that I eat more vegetables and much less processed food.  Whenever possible, I am buying and eating locally grown produce, and spending very little time and money at the conventional grocery store.  Can I get better?  Of course – and I’m continuing to work at it.

One reason that I love the Farmer’s Market and my CSA is that I like to know where my food come from.  I get to meet the people that grow what I’m eating, and what’s cooler than that?

However, I’ve realized that I haven’t applied that same philosophy to the meat that I eat.  I’m not going to lie – I like meat.  But when I buy a steak or a pack of chicken from the grocery store, what do I really know about what I’m putting in my body?  Not much, that’s for sure.  I’m lucky to have places like Brunty Farms to get locally raised chicken, pork and turkey, and like Dumas Meats, where they raise the majority of the beef that they sell.  I need to take advantage of that.

Whoops – made a bit of a speech there, didn’t I?  Let’s get back to what I cooked – and ate – this weekend.  Saturday, we grilled the brats from Brunty Farms.  The apple brats were a little softer, with a slightly sweet taste from the apple that went well with the spicy mustard and hot peppers (the only way to dress a brat!).  The beer brats had that awesome snap! when you bit into it, and the flavor was amazing.  I’ll definitely be buying those again!

The radishes also bit the dust on Saturday – Brian demolished both bunches in one sitting as an afternoon snack.

042713185841

Spicy mustard from the Schmit House in Columbus, Ohio.  You have to put German mustard on a brat!

Spicy mustard from the Schmidt House in Columbus, Ohio. You have to put German mustard on a brat!

Sunday, I made Tuscan Glazed Chicken and roasted potatoes, but the star of the show was the roasted carrots.  I trimmed the tops of the tiny carrots and scrubbed them with a vegetable brush, but didn’t peel them.  (I did trim the bottoms,)

I wish I could say this was locally raised chicken, but alas, this was from the grocery store.  Next time I'll be better...

I wish I could say this was locally raised chicken, but alas, this was from the grocery store. Next time I’ll be better…

042813162801

Then, I tossed the carrots in olive oil, salt, pepper and some Penzey’s Bonnes Herbes mixture. I roasted them in a 400 degree oven for 25-30 minutes – just until they were tender.  Conveniently, the potatoes took almost the same amount of time to cook.

The roasted carrots were delicious!

The roasted carrots were delicious!

The tiny potatoes were so cute!

The tiny potatoes were so cute!

It was a good weekend for food.

Hangover Soup

042513182323

I’d like to start by saying that I did NOT make this soup because I had a hangover.  (However, I did have a lingering headache all day that went away after I ate this…hmmmm…)

This is another recipe inspired by Smart Chefs Stay Slim, although I adjusted some proportions and used some random veggies I had hanging out in the fridge.  It’s basically a spicy broth with shrimp and greens – I can definitely understand why it would be good hangover food!

I’m going to write out the recipe as I made it, but you could easily substitute whatever greens/veggies you have on hand. It’s a great recipe for a fridge cleanout day!

Hangover Soup (makes two generous servings)

  • 2 cups chicken broth
  • 1 cup water
  • 1 heaping teaspoon Red Curry Paste
  • 1/2 teaspoon fish sauce
  • 1/2 teaspoon sugar
  • juice of 1/2 a lime
  • 1/2 cup leftover chicken, diced
  • 10-12 shrimp, peeled and deveined
  • 2 cloves garlic, sliced
  • 1 medium carrot, sliced in thin rounds
  • 1 1/2 cups Swiss chard, chopped
  • 2 scallions, chopped
  • chopped cilantro (for garnish)
  • salt and pepper to taste
  • 1 cup rice noodles (soaked in warm water for 8-10 minutes) or cooked rice (if you have some handy)

042513175829

Bring chicken broth and water to a boil.  Add red curry paste, fish sauce, sugar and lime juice.  Stir.  Add chicken, garlic and carrots.  Cook for about 2 minutes – just until the carrots start to soften.

Add rice noodles, shrimp, Swiss chard, scallions, salt and pepper and cook over medium high heat until the shrimp are cooked through.  Pour the noodle soup into two large bowls, top with cilantro (if you want) and an additional squeeze of fresh lime (or a wedge of lime for garnish).  Eat and enjoy!

That’s it.  It’s that easy.

Now, I did have to go buy curry paste and fish sauce, because I don’t usually cook with those ingredients, but I am so glad that I did!  I can easily see this soup becoming a go-to after work meal.  It was spicy but light, and I felt fantastic after I ate it.  What more can you ask for?

Fried Cabbage Hot Dogs

041613180652

I’d like to start by pointing out that I used both leftovers and frozen veggies from last season’s CSA in this somewhat unconventional hot dog.  Yippee!

Many times when I’m putting a dish together in my head, I find that I’m one or two ingredients shy of what I really want.  Today, when I was thinking of ways to use my weekend leftovers, I was determined to only use the food that I had in the house.  And I did!

We had some lovely weather in Northeast Ohio this weekend, so on Saturday, Brian grilled hamburgers and brats (spicy Andouille brats!  Yum!).  I sometimes feel that Brian loves condiments more than the actual base of the meal, so burgers and dogs are always accompanied by many, many toppings.  (To give you an idea, we had lettuce, broccoli sprouts, chopped onion, Hungarian hot peppers, cheese, and of course, ketchup, and several kinds of mustard.  I might be missing some, but that’s close.)

Brian's hamburger.  Yep, that's broccoli sprouts on the bottom bun.  They're good on hot dogs, too!

Brian’s hamburger. Yep, that’s broccoli sprouts on the bottom bun. They’re good on hot dogs, too!

As per usual on hamburger and hot dog days, we had an odd conglomeration of leftovers – quite a bit of chopped onion, one and a half hot peppers, a couple of brats that got grilled but not eaten, etc.

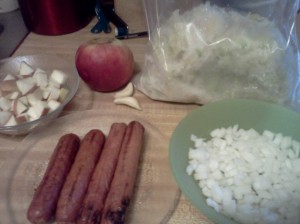
I knew that I wanted to use the leftover brats and hot dog buns, but I couldn’t decide what to top them with (sadly, we ate all the broccoli sprouts).  So, I started making mental inventory of my fridge and my new, big shiny freezer.  Ah ha!  I have frozen cabbage from my CSA!  And apples from my last farmer’s market trip!  And leftover onions and hot peppers!  Perfect.

041613173004

The flavors reminded me of this Fried Cabbage dish, but the addition of the apples added some needed sweetness.  I made extra because my plan is to have leftovers of this dish tomorrow with grilled pork chops.  (Leftovers of leftovers!  I’m about to blow my own mind!)

This made enough to easily top six good size hot dogs/brats.  I’m thinking it will reheat well, but I’ll find out tomorrow!

Fried Cabbage Hot Dog Topping

  • 1 cup white onion, diced
  • 1 apple, diced (I used an Ida Red – a little bit sweet, but holds up well to cooking)
  • 2 cloves garlic, diced
  • 2 cups chopped cabbage (I used cabbage from my CSA that I had shredded, blanched and frozen)
  • Olive oil
  • 2 Tablespoons Apple Cider Vinegar
  • 1/2 teaspoon Caraway Seed
  • Salt and fresh ground black pepper

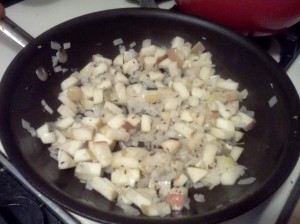
Sauté the onion and garlic with a bit of olive oil over medium heat.  When the onions are translucent, add the apples, Caraway seed, salt and pepper.  Continue cooking until the apples are soft.

041613174549

Remove the apple and onion mixture from the skillet and put off to the side.

In the same skillet, add the cabbage.  Now, because I did not plan ahead, I did not thaw the cabbage first.  I just tossed the frozen hunk of cabbage right into the hot skillet and it worked just fine.  Once it had thawed, I drained the excess water and turned the heat up to high.  Stir the cabbage often so it doesn’t brown.

041613175315

When the excess water is cooked off and the cabbage is heated through, add the apple and onion mixture back into the skillet.  Turn the heat down.  Add the apple cider vinegar, stir and taste it – if you need to, add more salt and pepper.  Continue cooking over medium/low heat for a few minutes to let the flavors meld.

That’s it for the fried cabbage topping!  I then started assembling my hot dog.  Lightly toasted hot dog bun, whole grain mustard, spicy brat.  Top the hot dog/brat with the fried cabbage topping and rings of Hungarian hot peppers. Eat and enjoy!!

041613180708

Warning:  These peppers range from mild to HOT!! and there’s no way to tell until you take a bite.  If you’re not a fan of heat, you may want to skip these.  In case you’re wondering, this particular pepper was hot enough that my lips were tingling after I ate it!  Just the way I like it.

This post is linked to What’s In the Box?  at In Her Chucks.

Grilled Sirloin with Horseradish Vinaigrette

040313182832

My ongoing obsession with sauces continues…

It’s actually starting to feel like Spring in Northeast Ohio, so this sauce is a fresh, bright horseradish vinaigrette.  It’s funny – the more recipes I post, the more I’ve been thinking about why I cook certain things.  I know that my cooking has been influenced by my CSA and trying to use in season veggies whenever possible, but I’ve noticed recently that the weather also has a major effect on what I cook.  Now that it’s a little warmer and the sun is making a rare appearance, I find myself wanting food that’s lighter, with lots of citrus and fresh herbs.  Plus, it’s much more pleasant to grill when you aren’t wading through snow! 

This is another recipe inspired by the book Smart Chefs Stay Slim.  I typically only think of vinaigrettes as salad dressing, so I was quite intrigued by the idea of serving it over a steak. 

I first tried the recipe as presented in the book, but although the flavors were great, it seemed a bit oily.  I adjusted the amounts, added a splash of lemon and tried using the food processor instead of blending it by hand. Perfect!

The bright green color from the parsley and thyme were so pretty.  I made this version with a top sirloin (grassfed) grilled simply with olive oil, salt and pepper, and some roasted asparagus.  The little bite from the horseradish and the vinegar, and the freshness of the herbs were such a good combination!

Horseradish Vinaigrette

  • 1/4 cup white wine vinegar
  • juice of 1/2 a lemon
  • 3 Tablespoons prepared horseradish
  • 2 teaspoons whole grain mustard
  • a handful of fresh, flat leaf parsley
  • 1 teaspoon fresh thyme leaves
  • 1/2 cup olive oil
  • salt and pepper to taste

040313180457

This vinaigrette is so easy!  Add all the ingredients except the olive oil to a food processor.  Blend for a few seconds until all the ingredients are combined.

As the food processor is on, add the olive oil in a thin stream through the hole in the lid.  Blend until smooth.  Taste – add salt and/or pepper as needed.  That’s it!

Use to top steak, fish, veggies – just about anything!  It might even be good as a dressing on a sub sandwich – Yum! 

Does your cooking style change with the seasons?  What are your favorite spring/summer dishes? 

Almost Perfect Pasta!

As I mentioned earlier I have had a bit of time on my hands which is ending soon. One of my goals has been to get good at making pasta. I have made it several times in the past with mixed results. It never quite got to the level I wanted it to be. We can get Ohio City Pasta at our Farmers Market and they set the bar pretty high. The other issue is I am like the peanuts character Pig Pen with flour. The entire kitchen was a mess the last time I did it and I looked like Casper the friendly ghost. So this time I set out to learn from the past and get an acceptable pasta on the table. I am a fan of semolina flour and found that the pizza dough we like the best was a combination of regular and semolina flour. I have tried doing an all semolina pasta dough and it was not to my liking. This time I used 1 1/2 cups of flour and 1/2 cup of semolina with 2 eggs and 2 table spoons of water. I mixed the dough by hand with a fork and hand kneaded it. I did 3 batches 2 regular and one I also added 1/2 package of frozen spinach that I squeezed the water out and minced finely. I had to add a little more water or flour depending on how the dough was coming out. I then let them rest for 30 minutes. I ran one batch of the regular and spinach through our kitchen aid mixer pasta rollers as a fettuccine. These were hung with care on the drying rack. At this point they looked fabulous but the truth is in the tasting.DSC05245

My next trial was to make ravioli. I made a quick filling from 1# ricotta, dash of nutmeg, 1 egg, 1 cup Parmigiano Reggiano, the remaining spinach and zest of 1/2 lemon. I assembled the ravioli and brushed one side with an egg wash so it would stick together and well they looked great as well.

I loved the one green one!

I loved the one green one!

So now came the big test. Care had made sauce for a meal earlier in the week and it was one of the best. I cooked each of the pastas and they were served with that sauce. The regular pasta was ….well it was actually great!! I was so happy it hit the mark. We tasted the spinach and …..it was even better!! I will use fresh spinach next time but the flavor come through even through the tomato sauce. So now we get to the ravioli. We both were really excited as we bit into the noodle portion it was perfect and then we hit the filling. What was that zinging taste?? The lemon. The filling was great but the lemon zest was overpowering even through the tomato sauce. It would have been unbelievable if it was not for that. Care mentioned that she would have not let me do it but alas I was left alone to my own devices. So next time I will make our own ricotta (it is easy and so much better than store-bought), fresh spinach and NO LEMON. All in all a good learning experience and the kitchen stayed pretty clean as I put bath towels everywhere. I am looking forward to branching out with other flavors as time permits. Any one have any fresh pasta hints to pass on??

Spinach and Artichoke Pizza

031513185801

This pizza was so good…

What’s that?  How good was it?

It was so good that I made it twice in two days.  I first made it on a  Friday night for a girl’s night in (side note:  it goes well with red wine).  I liked it so much that I made it again the next day so Brian could try it.

It was so tasty that I actually made it again a couple of weeks later so Mom could try it.  Yep – I’ve made this three times now!

I will admit that more than one person who ate this pizza said it was, and I quote, “The best pizza they had ever eaten.”  Now, I know that whatever you’re currently eating is always the best, so I take this with a  grain of salt.  That being said, I love compliments, so thank you!

My favorite part about making a mess of homemade pizza dough is that for a few days, I have quick easy meals that only take a few minutes and almost no effort to throw together.  Take this pizza, for example.  The only prep work I did for this pizza was to rough chop artichoke hearts and spinach, then pop the spinach in the microwave for a minute.  That’s it! Oh, I guess I grated the fontina cheese, too.  Still super easy!

Pizza toppings!  Roasted garlic sauce, artichoke hearts, spinach, three cheeses (fontina, asiago and mozz) and prosciutto.

Pizza toppings! Roasted garlic sauce, artichoke hearts, spinach, three cheeses (fontina, asiago and mozz) and prosciutto.

This stuff is awesome.  Really.

This stuff is awesome. Really.

Here’s the funny part – I’m calling it a Spinach and Artichoke Pizza, but this recipe started with the prosciutto.  I knew that my sister and my best friend were coming over, and they had been talking about prosciutto on pizza (Laura had tried my Butternut Squash and Prosciutto Pizza and was still talking about it).  So I started thinking about what I hadn’t put on a pizza yet that would go with prosciutto.

Of course!  Spinach and artichoke!  It makes a good dip, it goes well with cheese – done!

031613184107

I started with the garlic sauce, then the chopped marinated artichokes.  I added the slightly cooked spinach (I microwaved it for a minute – just enough to wilt it so it wasn’t raw tasting) and topped that with fontina, asiago and mozzarella cheese.  Fontina is one of Laura’s favorite cheeses, and it works well in a blend like this.  I added the prosciutto last, but you could totally leave that off and have a kick @ss veggie pizza.

As it cooked, it totally smelled just like good spinach and artichoke dip.  Yum!  The third time I made this pizza, I used baby spinach from the farmer’s market – super yum!  I’ll have to remember this when I get greens in my CSA share.  Maybe I’ll even try making my own roasted garlic spread – especially if the garlic I planted last fall does well!

031613185246

Our Spicy Mess

As you might have guessed Melissa I have a bit of time on my hands. While I am not cooking much I did do some salmon on the grill with a lime chipotle rub that is Care’s favorite along with grilled asparagus. She deserved a good meal as she has been taking exceptional care of me and not doing much for herself. Enough of the pre-amble I have not posted for a while and feel pretty bad that you are taking the lions share but here is a follow-up to your spice rack posting. As you can guess we have a lot of spices and the organization well here it is as best I can explain it.

DSC05239

The Main Spice Rack

The Main spice rack has the most common used items on it and is in our small pantry. The top shelf are items like curry, turmeric and other oddities. 2nd shelf has the dried green things like parsley, oregano, and all that good stuff, 3rd shelf continues with more of the green. The bottom shelf is my personal favorite and contains the bottles of various rubs I use on the grill and in the kitchen. As you can see most of these are Penzey’s.

The Other Stuff

The Other Stuff

The next location is for the little guys and some of the baking stuff. Main organization strategy was by size. This really is no help in finding what you are looking for as you might guess. To think that I have done  5-S organization strategies for a living I could come up with something better but it works.

The Stash

The Stash

Now to my personal favorite! These are two Ikea boxes full of Penzey’s “Bag O Spice”. Most of these are rubs or spices I use to make the rubs for the smoker. Again the organizational strategy is 2 boxes full of bags. Again it somehow works. So that is our spices and as you can see no clear format for storage. Hope to put up a food post soon!

Spinach and Caramelized Onion Quiche

033013120024

A couple of weeks ago, I made Meghan’s Broccoli Cheddar Quiche for a Sunday brunch.  It was amazing!!

Broccoli Cheddar Quiche with strawberries, bacon and mixed greens.  I love brunch!

Broccoli Cheddar Quiche with strawberries, bacon and mixed greens. I love brunch!

When I woke up this Saturday, I thought about this amazing quiche and looked over my fridge inventory.  (Alright, alright…make that when I got out of bed this Saturday,  I woke up around 8 – late for me! – because the cats wanted breakfast, but after they got fed I spent a good two hours in bed watching Food Network.  Don’t judge me.)

So, back to the fridge!  Eggs fresh from Brunty Farms?  Check.  Milk?  Yep.  No broccoli, but spinach from the farmer’s market?  Check.  Onions?  Always.  Cheese?  Ooo…Asiago!  Nice.

Nothin' beats a farm fresh egg.

Nothin’ beats a farm fresh egg.

Caramelized onions, spinach, cheese and eggs.  How can that be bad?  Answer:  It can’t.  It was awesome.

By the time it was done, I was too hungry to make the plate pretty.  I'm lucky I remembered to take the picture!

By the time it was done, I was too hungry to make the plate pretty. I’m lucky I remembered to take the picture!

Spinach and Caramelized Onion Quiche

  • 1 Quiche crust (Meghan from Clean Eats, Fast Feets recommended this recipe – it’s fantastic and so easy!)
  • 1 T butter
  • 1 medium white onion, sliced thin
  • A big handful (probably about 2 cups) baby spinach
  • 1/4 cup grated asiago cheese
  • 3 large eggs
  • 3/4 cup of milk
  • salt and pepper to taste
  • 1/4 t fresh ground nutmeg
  • 1/4 t cayenne pepper
  • 1/4 t ground mustard
  • 1/2 t garlic powder

Preheat oven to 350 degrees.

Make the quiche crust (or use premade).  I made the quiche crust linked above, but I did prebake it for about 5 minutes before filling the crust.  (Thanks for the tip, Meghan!)  Put the crust aside while you work on the filling.

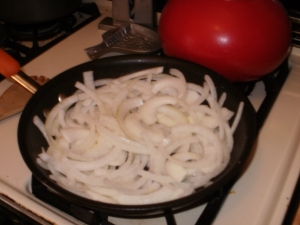
In a medium sauté pan over low heat, add the butter and sliced onion.  I added a pinch of salt and let the onions cook over low/medium low heat for about 30 minutes until they were nicely caramelized.

Onions pre-caramelization.

Onions pre-caramelization.

Caramelized onions - yum!

Caramelized onions – yum!

While the onions were cooking, I used a fork to whisk together the milk, eggs and spices (pinch of salt, fresh ground pepper, nutmeg, cayenne, ground mustard, garlic powder).

I mixed the milk and eggs together in the measuring cup - anything I can do to dirty less dishes is a win.

I mixed the milk and eggs together in the measuring cup – anything I can do to dirty less dishes is a win.

Once the onions were nicely caramelized, I added the spinach to the pan with the onions and covered it for about a minute – just long enough to wilt the spinach.  The spinach leaves were small and tender, so I didn’t even bother chopping them up.

OLYMPUS DIGITAL CAMERA

Once the spinach was wilted but still bright green, I mixed the spinach and onions together and transferred them into the quiche crust.  I topped that with the asiago cheese and poured in the egg mixture.

I baked the quiche for about 40 minutes in a 350 degree oven, until the top was a beautiful golden brown and the eggs were cooked all through.

When it was done, it took all my willpower to let it cool – I was hungry and it smelled really good!  As soon as possible, I cut a big piece and dug in.  So yummy!  The crust was perfect, the onions were soft and sweet, the asiago cheese gave it just a little bite, and the eggs held everything together.

I can still call it breakfast if I ate it at noon, right?

This post is linked to What’s in the Box?  at InHerChucks.

Butternut Squash Mole Sauce

Phone 032913 482

It’s now the beginning of April, and I am still trying to find ways to use winter squash! It’s totally my own fault though – I did buy an extra butternut squash at the farmer’s market a couple weeks ago.

I used half the butternut squash in my Spinach and Butternut Squash Pasta, but I still had to figure out what to do with the other half.

I wanted to try something different, but what?  Well, I watched a marathon of the show “Chopped” on Food Network the other day, and I noticed one thing.  No matter what the chefs on “Chopped” made, they always made a sauce.  And if that sauce wasn’t any good, or they ran out of time and didn’t get it on the plate, they typically didn’t make it to the next round.

Thankfully, I don’t have famous chefs critiquing the food that I made in my kitchen, or they would be horrified by the lack of sauce on my dishes!  But I did think that I could probably make a cool sauce using the butternut squash.  Turns out, I was right!

032913180929

032913180937

I sliced the pork chops and piled all this good stuff into a flour tortilla. Super tasty!

I know it’s not a traditional mole, but Butternut Squash and Anaheim Chili Sauce just didn’t have the right flow.  Call it creative license.

Butternut Squash Mole

  • 1 1/2 lbs Butternut Squash, cubed
  • 3 dried Anaheim Chilis (Ancho would work too, I just couldn’t find them.)
  • 1 medium white onion, rough chopped
  • 5-10 garlic cloves, depending on size (I used an entire head of garlic – about 6 big cloves)
  • Chinese Five Spice (the jar I have is a blend of Star Anise, Cinnamon, Cloves, Fennel and Black Pepper)
  • Olive oil
  • Salt
  • Pepper

Toast the dried chilis on a baking sheet in a 350 degree oven for about 10 minutes.

They smelled awesome - sort of a warn, smoky, chocolate scent.  Very unexpected.

They smelled awesome – sort of a warn, smoky, chocolate scent. Very unexpected.

Once the chilies are toasted, remove them from the oven.  (Side Note:  I chopped off the top stems and shook out some of the seeds because I had never worked with dried chilies before and I didn’t know how hot they would be. I have no idea if that’s approved behavior or not.)  Soak the chilies in hot water to rehydrate.  You’ll also use this water when blending the sauce.

The water takes on the color of the chili peppers almost immediately.

The water takes on the color of the chili peppers almost immediately.

Toss the cubed squash, chopped onion and garlic with olive oil (enough to coat), salt, pepper, and a couple big pinches of Chinese Five Spice.  Transfer the squash mixture to a baking sheet (I used the same one I toasted the peppers on) and roast in a 350-400 degree oven for about a half hour.

After roasting - you want the veggies to be soft and get that caramelized outside.

After roasting – you want the veggies to be soft and get that caramelized outside.

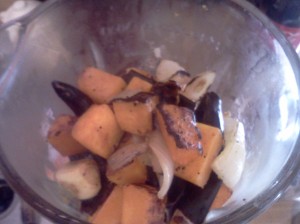
Transfer the roasted veggies to a blender.  Add the rehydrated chili peppers (I only added two peppers at first – after I blended the sauce a bit, I tasted it before adding the last pepper) and some of the chili pepper water.

Looking down into the blender...

Looking down into the blender…

I added about a cup of water, blended it, tasted it, added a pinch of salt and another half cup of water and blended it some more.  Make it as thick or as thin as you like – I wanted a thicker, more substantial sauce.

Once the sauce is made, it keeps really well in the refrigerator and reheats beautifully.  I almost wish I had another butternut squash to make some more!  It went well with chicken, potatoes, pork, eggs – the list goes on and on!

This post is linked to What’s in the Box?  at In Her Chucks. 

What’s your go-to sauce?  I still have a half-dozen dried peppers left – any suggestions? 

Like Daughter, Like Mother!!!

I don't know where she gets it! Love, Mom

I don’t know where she gets it! Love, Mom


Edit (by Melissa):  Laura sent us a picture of her spice cabinet as well – looks like we were both wrong, Mom!  Her spices look pretty much just like ours.  I guess it’s a family thing! 

Laura's spice cabinet

Laura’s spice cabinet